Sunday, June 2, 2013

First Anniversary!


All of our wedding and engagement photos are thanks to Lauryn Galloway Photography
It's hard to believe it's been a year today since Matt & I exchanged vows.   It's been a whirlwind year without a doubt-we have squeezed more changes into the past year than most couples face in 5 years.  About a week after we were married Matt moved to Winchester for a new job opportunity that we couldn't turn down while I stayed behind in Roanoke to finish 6 more months of school.  Then came house shopping (in July) and finally closing on our first house in September.  Then renovations started in October. Studying for the biggest exam of my life, graduation, and moving out of my Roanoke apartment came in December.  Right before Christmas we started moving into our house (but the projects didn't stop there, sorry Matt!) and then in January I started my first job as a Physician Assistant and Matt started another new job with a much shorter commute. 

We are thankful to finally feel settled in our home and grateful for all the opportunities that presented in the past year that lead us to here.  We spent our anniversary at the Inn at Vaucluse Spring which is where I got ready with my bridesmaids last year before our wedding and where Matt and I stayed after the wedding.  It was nice to be back there again, especially since this time we had a little more time to relax than we did last year!
We spent Saturday afternoon at Barrel Oak Winery after we took our favorite four-leggeds to Elizabeth Furnace


Happy 1st anniversary Matt! Thanks for supporting my crazy and occasionally last minute project ideas, being my running buddy, and most of all for choosing to love me every day whether I'm at my best or my worst.  You're the best.


xo
Steph

Friday, May 31, 2013

DIY Pottery Barn Inspired Shelves

This project was inspired by Shanty 2 Chic and her $20 shelves (and a friend who had just made similar shelves and promised it would be a simple project).  It turns out it was a simple and inexpensive project and I love how it turned out.  Pottery Barn sells similar shelves for $35-$55 that look like this:
Gorgeous.  But expensive.  Especially since I wanted four of the 3' ledges at $45 each!  We followed the tutorial over at Shanty 2 Chic but we had Lowe's cut the 2 – 1×4′s and 1 – 1×2 for each shelf down to 3'.  After Matt assembled the shelves for me I stained the shelves with a Rust-Oleum Dark Walnut (I purchased a 1/2 pint at Lowe's for about $5).  Later that evening after the stain dried (it dried really fast!) I used some leftover paint (Benjamin Moore Arctic Blue) from painting our laundry room.  I let the paint dry over night and then the next day I sanded the paint to distress the shelves so the dark stain would peek through.  I love how they turned out!


The best part? I can rearrange to my heart's content without having to patch nail holes and rehang picture frames.


Thanks for stopping in!

xo
Steph

Tuesday, May 28, 2013

Exterior Update: The Reveal

The first time I laid eyes on our house it looked like this...
But in my mind it looked more like this...

& a few times along the way it looked like this...
Along the way it was easy to get lost in whichever project we were working on at the time and lose sight of my original vision, making it hard to imagine what it would like when "finished" (if we will ever be finished I don't know!) And now, though there are still numerous things to do inside and outside I am so glad that it finally looks more like what I imagined it would all those months ago (we closed on our house in September 2012)!

Here's a list of the exterior updates that we made:
-adding a false gable (you can see it framed out in the picture above)
-new soffit & fascia
-new siding
-new roof
-new shutters
-paint the brick part of the house to match the new siding
-new porch railings
-new concrete walkway and steps
-raised garden bed
-and in the back we tore out the old deck and put in a brick paver patio

 PS Can you find the puggle in the picture above??

& I love our new window box,  more on that next!

Thanks for stopping by again,

xo
Steph

Craigslist Dining Table Makeover

Last post I showed you how our china cabinet went from this...
 to this with the help of Annie Sloan chalk paint.
Before the China Cabinet came along though I found a set of four chairs and a table on craigslist (before we even moved into the house) and of course I painted them white but for that project I used a homemade chalk paint (paint + plaster of paris + water) using a recipe from Naptime Decorator and some paint I had left over from painting this mantle for our wedding (photo thanks to Lauryn Galloway).
So this is what I started with, in this picture you can see that I started to sand the table because I had originally want to stain the top and paint the legs, but quickly discovered that the tabletop was only a wood veneer and it wouldn't be possible to stain it. So I stopped wasting my time sanding and got to work painting because one of the benefits of chalk paint (both Annie Sloan and the homemade version) is that you don't need to spend any time sanding or prepping your piece of furniture aside from making sure it is clean and dry.
The table took three coats of paint and the chairs each took two (let the paint dry completely between coats.  Then after the last coat of paint I let the paint cure for several days and then used wax to seal the paint and to help prevent scratching or chipping of the paint. I used a cloth to apply the wax and rubbed it in firmly to the paint and wiped away the excess wax.  I used Minwax Paste Finishing Wax and have used this for my Annie Sloan china cabinet as well (Annie Sloan also makes a waxing product but it's about double the cost of Minwax) and Minwax has worked well for me!
source

I also painted the four chairs that came with the table and two other chairs that I got for free off of the curb in Roanoke. Here's the table as it is now.  I love the way it turned out!  The grand total spent came in right at $100.

  • table and four chairs- $75
  • two head chairs- free!
  • paint- $0 (leftover from a previous project)
  • plaster of paris- around $5 (with a coupon at Michael's and there is plenty leftover for future projects)
  • fabric-around $20 (I used Online Fabric Store)


When comparing Annie Sloan chalk paint to the homemade version Annie Sloan paint definitely goes on a little smoother and has a smoother finish.  The biggest downside to using Annie Sloan chalk paint is the cost (its around $38 per quart) however it really does go a long way...my huge china cabinet only took two quarts of paint! I really anticipated that I would need more than that.  Overall there are benefits of both homemade and Annie Sloan & I think I will use both again in the future!  Have you tried Annie Sloan paint compared to homemade chalk paint?  Let me know your thoughts!


Thanks for stopping by!

xo
Steph


Tuesday, May 7, 2013

Annie Sloan Chalk Paint China Cabinet Makeover

Since we bought our house one of my favorite hobbies has become combing Craigslist for good deals on furniture.  For the past several months I have been looking for a china cabinet that would give us some much needed extra storage and look pretty of course.  About a month ago I found this little gem.  Well, maybe little is the wrong word.  Anyways, here she is.
And I've been so anxious to get some Annie Sloan paint and brighten this cabinet up.  Here are some inspiration images of painted china cabinets that I found on Pinterest.
source

source

source
There is something about white painted furniture that I just love.  I have been looking forward to trying out Annie Sloan chalk paint so when we visited some friends in Roanoke last weekend I had to stop by Black Dog Salvage to pick some up.  I bought two colors, Provence and Old White and I got to work!
First we took off all of the doors and I started painting the inside of the cabinet in Provence.
Unfortunately I didn't take many more pictures of the progress but after I finished painting the inside of the cabinet in Provence I started working on the doors and the outside of the cabinet painting with Old White. And I love how the cabinet turned out! I was undecided if I would like the splash of color on the inside of the cabinet or if I should paint it the same color as the rest of the cabinet but I love how it makes the white china and milk glass really pop. 


Thanks for stopping by!

xo
Steph

Tuesday, April 23, 2013

DIY Paver Patio

This has to be one of our biggest weekend projects to date.  I still can't believe that we managed to get it all done in one weekend.  When we first saw our house the back of the house looked like this:

Yikes.  The deck wasn't in the best shape so one of the first projects back in the fall was demolishing it. So after demolishing what was there we had a yard of mud and rocks through the winter...


 Now that Spring is finally here I was anxious to have a place to enjoy the warmer weather.  A mud pit is not ideal for outdoor grilling and dining!  We went to Lowes & Home Depot to check out paver supplies.  I wanted our patio to be consistent with the colors of our concrete stamped steps and walkway in the front and the garden retaining wall. 


I ended up loving the look of brick paver patios. The downside of course is the sheer number needed to cover the area since they are so small-we ended up needing around 2100 brick pavers (that's around 8,000 lbs of pavers!)  The next decision was the pattern to lay the bricks in...Matt was all about simplicity and would have preferred simply running the bricks but I loved the classic/historic look of a herringbone pattern.

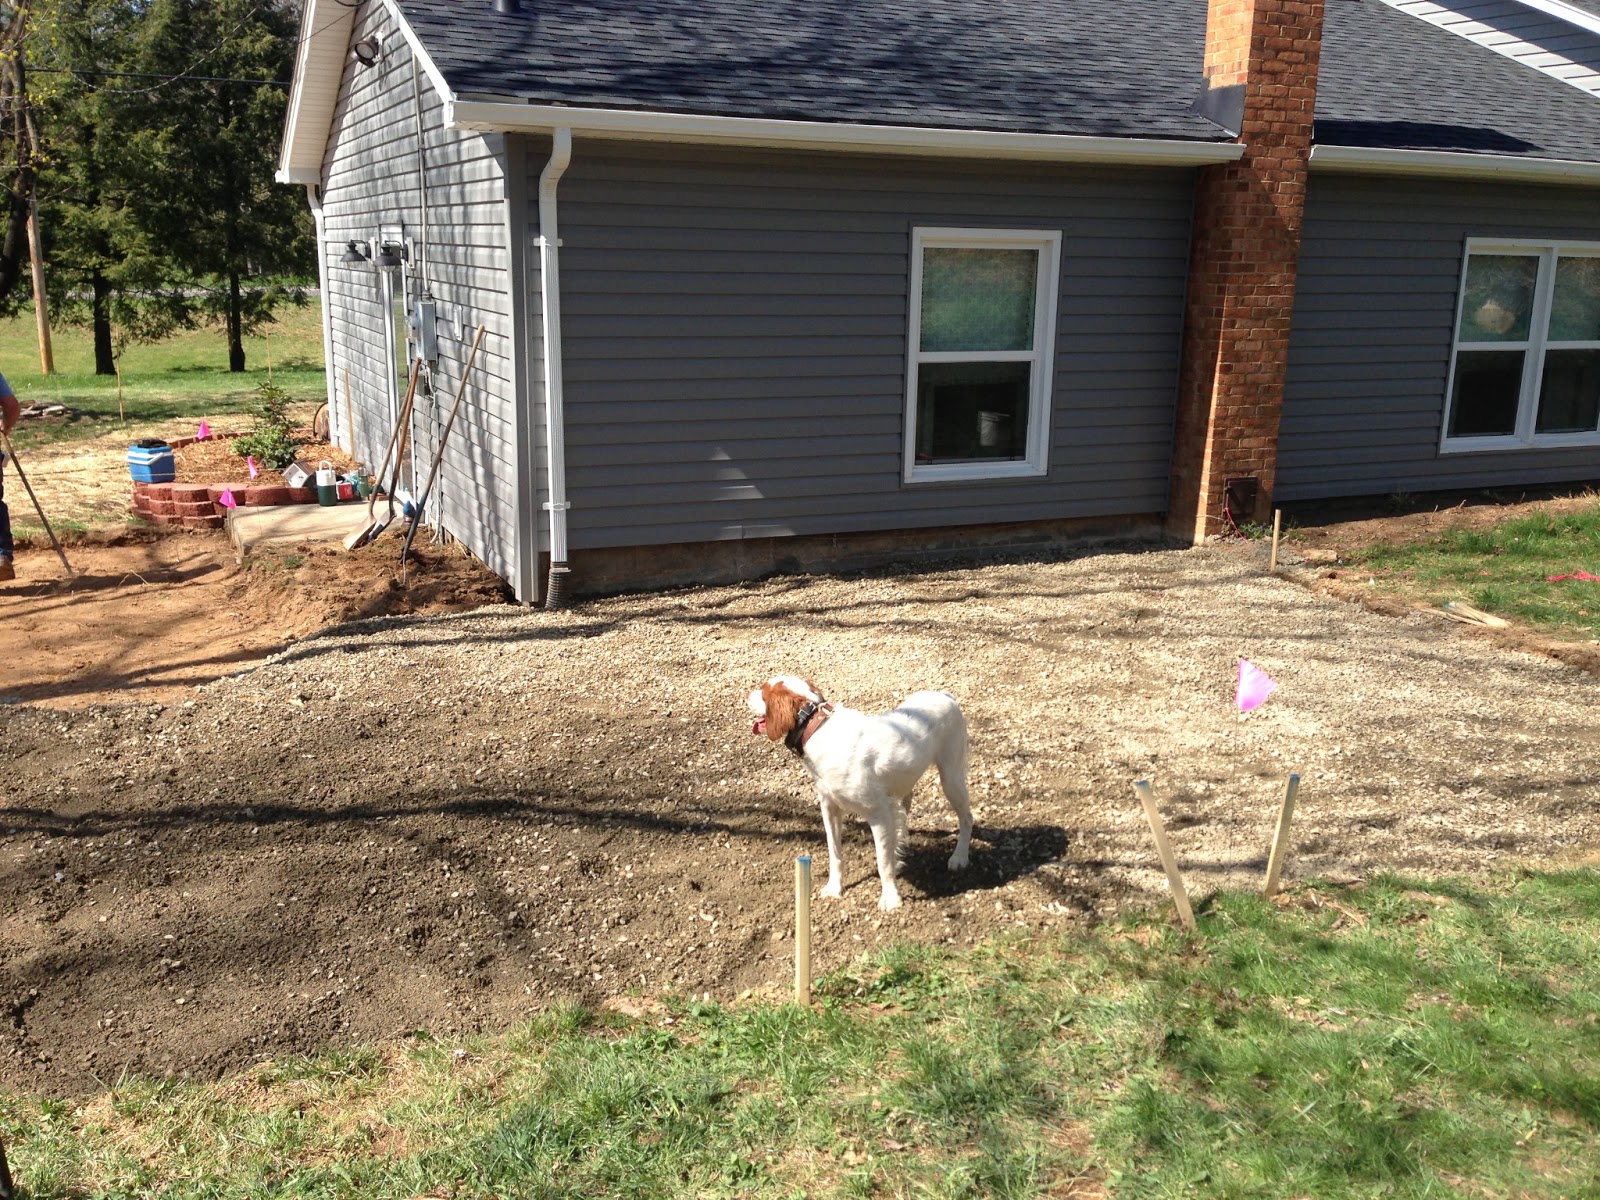
Then we started in on the hard work. The first step in preparing the area for a paver patio is digging a base.  Most sources I read recommended digging at least 6 inches down.  This is where my dad came in with his Kubota. Hand digging the base for a patio this size would have taken us a zillion weekends but he was able to get it done in a day!  We still had to hand dig in some tight areas but overall it saved us a ton of time and effort. Avery wanted to help too, of course.
After digging our base we filled the area for the patio with gravel and then packed it down to prevent shifting of the pavers. And of course Avery continued to supervise our progress...
Later that evening we went for supplies...we had to take several trips because the pallets of bricks were so heavy and we ended up needing 3 pallets (about 700 bricks were in each pallet).  We also learned that when you are buying in bulk like this it doesn't hurt to ask if Lowes or Home Depot will give you a discount, we worked with Lowes and were pleasantly surprised that they were so flexible!
The next day we started laying the bricks.  Before laying the bricks we spread sand over top of the gravel and tried to make the base as level as possible.  This tutorial was helpful in explaining the basic process of laying herringbone bricks.  Once you get started the pattern is simple to follow.  This pattern did require a good bit of cutting along the edges of the patio.
After you get the first row lined up the next rows fall right into place...
The last step is to spread sand over the patio & sweep the sand into the cracks between the bricks to stabilize the patio and then spray down the patio with water (and repeat). Here are a few pictures of the patio as it is now but I won't call it finished quite yet.  We still plan on building a retaining wall around the back edges and making a fire pit but the difficult part is behind us! 


Thanks for stopping by!


xo,
Steph

Sunday, March 3, 2013

diy ottoman from a pallet


This has to be my favorite Pinterest project to date.  I have been looking for a large tufted ottoman that would complement our living room decor and fit the space well.  There was one ottoman in particular that caught my eye on Amazon but was in the neighborhood of $400.  Not really a realistic budget for us. 


I remembered seeing a tutorial on turning a pallet into an ottoman on Pinterest and somehow talked Matt into spending a weekend working on this impromptu project with me. So here we go!


I won't detail our step by step instructions because overall we followed this tutorial from Domestic Superhero who does a much better job than we ever could describing the step by step process. The biggest change we made to our ottoman compared to the tutorial from Domestic Superhero is the size, we did not cut down the pallet at all-we used the whole thing (it measures almost 40in x 40in) because I really wanted an oversized ottoman. This meant that our fabric was not wide enough to stretch all the way down to the pallet so we essentially created two separate pieces and used liquid nail to adhere them together. This might make a bit more sense with some pictures of the progress:


The picture above is the half of the ottoman that contains the pallet, we lined the sides with foam and covered the foam with fabric and attached the legs to the bottom of the pallet.

And this picture above is the top half of the ottoman, consisting of particle board, tons of foam and batting material and fabric overlying all of the that.  Word to the wise, more foam=more strength required for tufting.  I thought I would be able to tuft this by myself but Matt ended up having to do it for me.  That being said we love that we spent a little more on the extra thick foam and it was well worth the effort for the end result.


Here it is in our living room, I love the way it fills the space and coordinates with the rest of the living room without being too matchy-matchy.  All things said and done we spent about $180 on this project, due to the sheer size of it we needed a TON of foam ($$$-make sure you use a coupon for Hobby Lobby or JoAnn's for this), batting, and fabric  This can definitely be done for less if you choose to make a smaller ottoman!

Thanks for stopping by!

xo,
Steph